Grout Cleaning
Welcome to my Work History archive where you will find detailed examples of the cleaning and renovation of Grout carried out in West Sussex

The top layer of grout is porous and can absorb grease, dirt and limescale. Spillages such as wine, lemonades or greasy substances will cause marks and patches in the joints in the floor. Grout between wall-tiles particularly in damp areas like bathrooms will become dirty and unattractive as a result of Mould, Mildew and Limescale.
Mould is one of the most unsightly problems, which usually starts off in the wettest area of the room, this could be the bottom of the shower or bath, then starts to spread and if left unchecked could cover a large area of the wall.
Another common issue we find is a problem known as Grout Haze or Grout Smearing where a thin layer of grout has been left to set on the surface of the tile. Once grout has set it is difficult to remove.
Discolouration of grout joints in bath or shower areas due to continued use of acid formulated shampoos and soaps. This causes yellow orange and pink stains to the grout over even a short period of time. Whilst Grout Joints can be cleaned, badly stained grout may need to be re-coloured.
Protecting your grout in advance with a sealer will prevent most of these issues and although relatively unknown in the UK, protection awareness is growing. Sealing forms an invisible barrier between the grout and the surface, this will then protect your investment for years to come.
We have solutions for all the problems listed above and below you will find detailed examples of work we have carried out in the past to resolve many of these issues. It should give you some idea of what’s involved and what can be achieved with the right techniques and products.
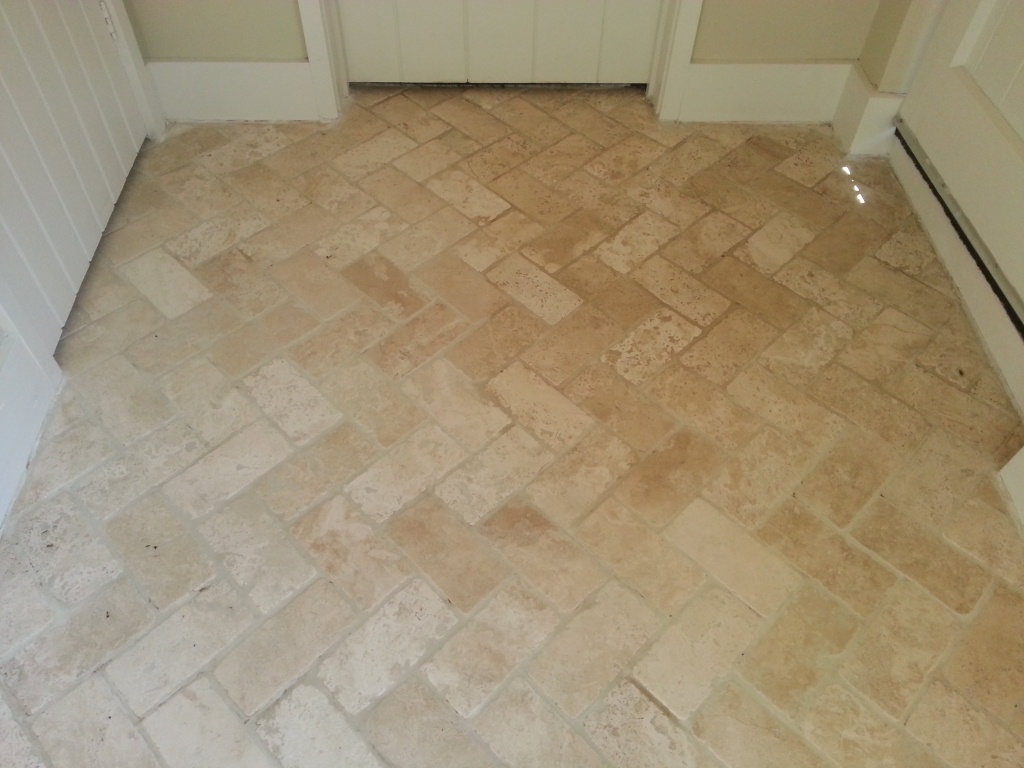
This Travertine tiled floor was installed in the high traffic lobby area of a house in Horsham, the tiles were in reasonable condition but had become dull over the years and were now in need of a refresh

Cleaning Travertine Tile
I swept the floor and gave it a quick wash with Tile Doctor Pro-Clean paying particular attention to the grout joints on which I used a stiff hand brush along the grout lines to get them looking clean. The next step was to use the diamond encrusted burnishing pad system starting with the coarse pad and water to clean the tiles and remove any remaining sealant that may have been present on the tile. This was continued with the finer pads using nothing but water as before then rinsing the floor of any dirt picked up by the pads. When the floor was dry I used a green polishing pad to add a shine to the floor.
Sealing Travertine Tile
To protect the travertine it was sealed using two coats of Tile Doctor Colour Grow which is an impregnating sealer which enhances the natural colour in stone. Once it was all dry again I buffed it up again but used a soft white buffing pad. You can’t really appreciate the difference in the photographs however natural stones such as travertine tiles do need to be maintained on a regular basis if you want them to keep on looking good.

Travertine Tiled floor refreshed in West Sussex
Travertine Tiled Floor Maintained in Horsham Read More »


